No Code, No Sweat: Turning Ideas into Mobile Apps

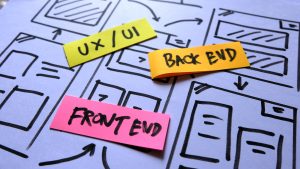
Ux developer and ui designer brainstorming about mobile app interface wireframe design on table with customer breif and color code at modern office.Creative digital development agency
We live in an era of unprecedented opportunities where a lack of coding knowledge no longer stifles ideas. Thanks to the proliferation of no-code tools and artificial intelligence (AI), anyone with an idea and a willingness to learn an easy-to-use, drag-and-drop interface can create mobile and web applications. However, it’s important to remember that an idea alone isn’t enough. Building a successful app requires careful execution, starting from the foundational steps of ideation, design, prototyping, development, and launch. In this article, we’ll guide you through the step-by-step process of launching a successful app and list various no-code tools that can help you along the way. Most of the tools mentioned here offer free trials or have a completely free base tier that you can use to build an app.
The App Development Lifecycle
Before diving into app development, following specific steps is crucial to give your app the best chance to succeed. Your immediate goal is to create a Minimum Viable Product (MVP). The MVP is the most basic version of your product that can be released quickly to gather user feedback and test its viability as a business. Getting your app into the hands of your target users as soon as possible ensures that users are willing to use and potentially pay for it and that your efforts in building an expanded, feature-rich app will be worthwhile. So, how do you reach the MVP stage? Let’s start with Requirement Gathering.
-
Requirement Gathering
Before designing the interface or building the app, take the time to plan and document your app. Brainstorm and note down its purpose, the problem it solves, or the need it fulfills. Remember, the documentation will be the guideposts that will inform the rest of the process and the possible success of your app. Be very careful to think it through and be as thorough as possible.
Ask yourself the following questions:
- What is the app’s purpose, and what problem does it solve?
- How does my app solve the problem better than existing similar apps or solutions?
- Who is the target audience for the app? What are their demographics, interests, and behaviors?
- What are the core features and functionalities of the app? Which features are essential for the MVP?
- What are the technical requirements for the app? Which platforms and devices should it be compatible with?
Tools to help you document and brainstorm ideas for your app:
- Mind-mapping: Freehand by Invision
- Notetaking & Project Management: Notion
- Pen and Paper
-
Design & Prototyping
The next step on your journey to launching the next unicorn is designing the application interface and prototyping its navigation. You don’t need to be a professional designer for this step. Focus on designing the overall layout and navigation of the app pages rather than the icons, colors, or aesthetics. Create basic black and white “wireframes” of your app’s pages to understand how users would interact and navigate through the app. Tools like Uizard can help you scan hand-sketch designs into professional wireframes automatically. Uizard even offers an AI-powered tool that designs a professional app based on your input.
Layout each page, from the sign-up page to the home page to the profile page and everything in between. You can also create a functioning navigational prototype that responds to clicks and moves users through the app’s pages like a working app, albeit without functionality. For example, clicking the home button on your layout would take you to the home page.
This step will help you understand how users interact with your app and how features are interconnected. Combined with the requirement specifications, it will define what you’ll build and where you should focus your efforts.
Tools to help you design and prototype your app:
- Wireframing tool: Balsamiq Mockups
- Design and prototyping tools: Justinmind, Uizard
-
App Development
While no-code tools eliminate the need for coding, building an app still requires effort. You’ll need to learn how the chosen platform works, how it handles data, and the logic of the app. The good news is that most no-code tools offer visual, drag-and-drop interfaces that make app building relatively intuitive. These tools usually provide all the necessary features to create a fully functioning MVP, including pre-built app templates for popular categories like e-commerce, listings, and bookings, which you can customize to fit your needs.
Some apps even utilize AI to automate much of the heavy lifting. By entering basic information about the app you want to build, the platform automatically generates it in a matter of minutes. From there, you can customize it to your liking. Consult the platform’s native tutorials, engage with the community on forums, and watch YouTube tutorials to familiarize yourself with your chosen platform. While it may take a few weeks, you’ll be building your app as you learn, and within a month or so, depending on your progress, you should have a working MVP.
Tools to help you design and build your app:
- AI Website tools: Leia, 10Web, Durable
- Web app tools: Bubble
- Mobile app tools: Softr, Adalo
-
Testing & Launch
Once you have your MVP up and running, gathering feedback from friends, family, and colleagues who can act as testers is crucial. Remember to provide them with a list of steps to follow and encourage them to experiment with the app. Ask them to sign up, log in, use the features, log out, delete their accounts, and more. Track each bug report and inform testers when issues are resolved, asking them to re-test them before removing them from the list.
When you’re confident that you’ve addressed the bugs, it’s time to launch your app on your preferred platform, be it a web or app store. Prior to and after the launch, it’s recommended to market your app as much as possible on platforms like ProductHunt, Reddit, relevant websites, and social media.
Tools to help you test your app:
- Bug tracking: Excel, Google Sheets, Trello
-
Maintenance
Launching an MVP is just the first step. As you gain traction and attract more users, expect to receive bug reports and feature requests. This positive sign indicates that users are becoming invested in your app. If you start receiving positive responses, reviews, and potential revenue, your MVP has successfully validated your idea. At this point, you’ll need to decide whether the no-code platform has the necessary functionality to develop your app further or if it’s time to outsource development to a professional developer or team.
Remember, you may also need to update your app to accommodate version or security updates for the launch platforms (iOS, Android, Web).
Conclusion
By following these steps, you’ll be on the right path to documenting, designing, building, testing, launching, and maintaining your first app. With no-code tools, you can have an MVP up and running within weeks or months, allowing you to validate your idea with minimal time, cost, and effort.
At times, however, working with a dedicated, experienced app development team may still be more beneficial. Whether the time and effort would be too costly, or you would like to move from an MVP to a full fledged product that may require more flexibility or advanced features, you may want to consider a professional developer or team to build and maintain the app for you. In that instance, contact Flordia’s award-winning digital agency KallistoTech to discover how we can help you build and launch world-class mobile apps and websites.
 Previous Post